

What is Discord?
Discord is a communications platform, similar in ways to Slack, but originally designed for gamers. Beyond foundational functionalities like text, video call, voice call, it has tools and bots which make it effective for managing communities. Users can join public or private servers, and within these servers, there are channels (general chat, memes, events, giveaways) grouped in categories (e.g. welcome, main city, voice channels). Permissions can also be set to what different individuals can or cannot see. This makes organization of information and discussions a lot more manageable.

Benefits of setting up a DAO in Discord
Role setting and token gating
Clear roles help mark permissions or task distribution for members in a DAO. In the Discord server, different permissions could be assigned to different roles. Token gated permissions with tools such as Collab.land also enable help differentiate those who hold the DAO’s token and those who do not. For example, in KopiDAO’s Discord server, DAO members hold the KopiCup NFT and thus have access to L2 & L3 channels. On the other hand, public subscribers do not hold the NFT, and thus can only see L1 channels.
Different channels for specific purposes
Each channel can serve a specific purpose. Some channels are read-only, which make it great for disseminating one way. Some channels are similar to your conventional chat platform. And most recently, a forum-type channel has been added to Discord’s functionalities. For DAO management, examples of channels are:
Verify Membership - A channel for new DAO members to verify their token ownership and get their specific roles in the Discord server
DAO governance - A channel for DAO members to submit and vote on proposals
DAO treasury - A channel for DAO members to view and track the treasury transparently
Discord Bots
Discord supports 3rd party bots that help automate functions and engage the community. The great thing about these bots is that they do not require coding experience and many are free! A common place to find which bots to use is top.gg.
The basic of setting up
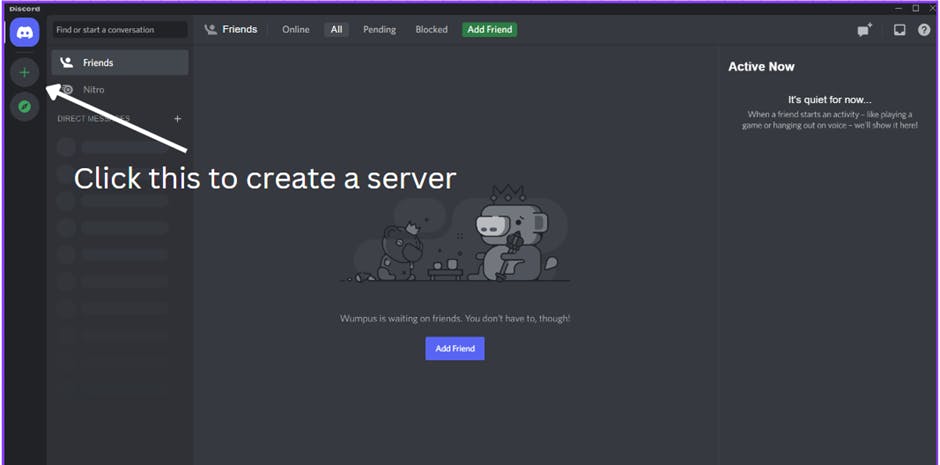
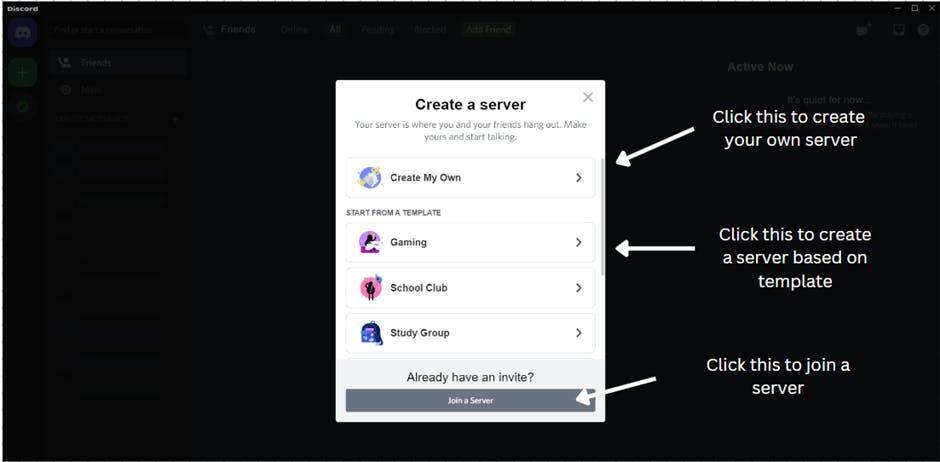
1. Create a server
Think of the server as a house for your DAO. It is the address and exterior façade. Here is how you set up your house:
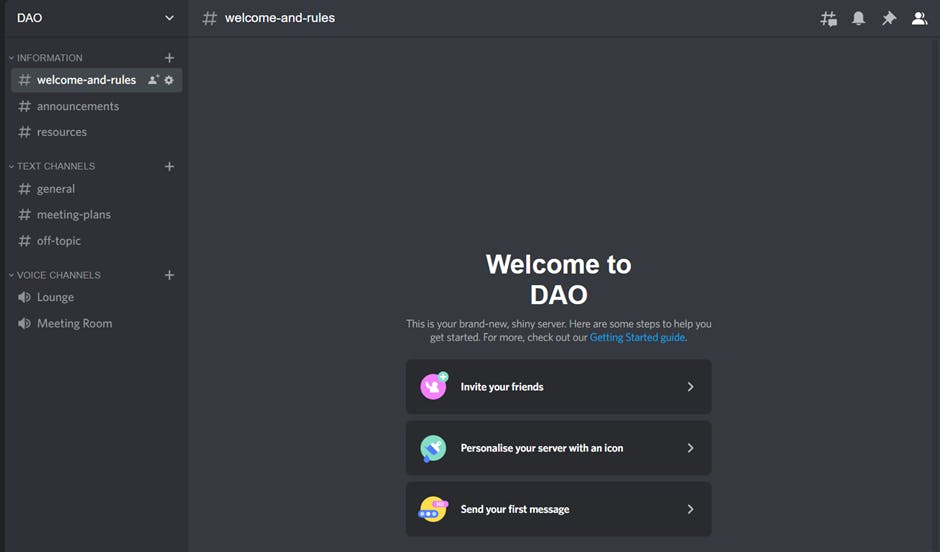
2. Create different categories and channels for the DAO members
A category is like the floors, and the channels are like the rooms in a house. Organizing them well makes it more intuitive to navigate around your server.
Examples of categories and channels that can be created for a DAO server:
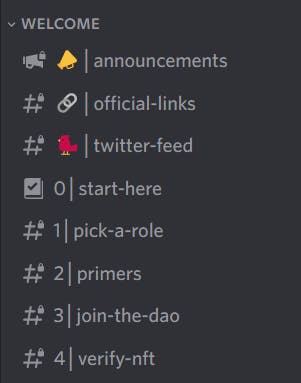 A welcome category with a few channels to get new members on board
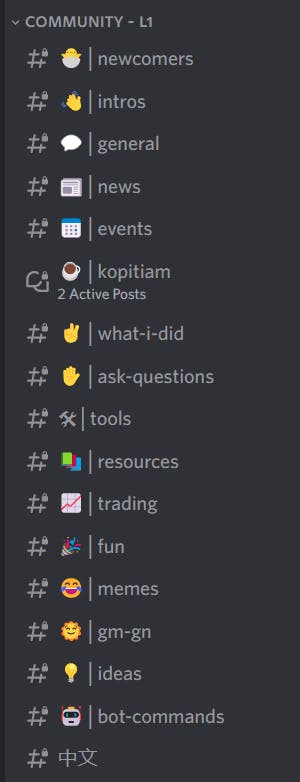 A community (L1) category where everyone can chat and have discussions
3. Setting up different roles and permissions
Roles in a server can be known as a defined set of permissions with a particular name.
Permissions are the privileges that are given to specific roles. It also determines how members can change the settings of the server such as reacting to messages and deleting messages.
Examples of roles and permissions in KopiDAO discord server:
Team: Can access all channels and make changes to it
DAO Member: Can access all DAO channels and public community channels (L1 & L2)
Scholar: Can access all DAO channels and public community channels (L1 & L2)
Subscriber: Can access all public community channels (L1)
4. Invite bots to your server
Examples of bots that can be very useful for a DAO discord server:
Token Gating: Collabland
Community Management: Mee6
Server Statistics: Server Stats
Entertainment: Dank Memer
Event Scheduling: sesh.fyi
5. Ready to go
By simply following the steps above, your DAO’s Discord is all set to go! Now invite your newly-formed community members to hangout, engage, and organize for the future of work!
Summary
Throughout the article, we have learnt that:
What is Discord
Benefits of using Discord as DAO management
The basics of setting up
Last but not least, I would like to express my deepest gratitude to Daniel, TY, and Jason from KopiDAO for helping me improve the structure of the article. I hope you guys enjoy this article and if you have any doubts, feel free to leave a comment so we can get back to you 🤗.
Are you keen to learn more about other basic topics in Web3? This article was co-published with KopiDAO, the Southeast Asian Web3 learning community. We run physical workshops and will launch an online Academy very soon, where you can earn your Web3 credentials in the form of a soulbound token. Join us to get access to a network of professionals who are all experimenting with the next evolution of the internet while sipping a cup of kopi ☕️.